Dracion Tales: Breath of the Plains
Welcome to Dracion Tales: Breath of the Plains! This mod adds several creatures and items from the game Legend of Zelda: Breath of the Wild. There are many, many monsters and drops added to Minecraft by this mod.
Credits
- Nintendo Co., Ltd. - Makers of Breath of the Wild
- Everyone on the Nintendo team
- Grazzy - BotW Map used for panoramic and original tower and shrine designs
- StegoLego - Models, Textures, and Code
Now, onto the mod!
Items and Blocks
Items
There are several items added in this mod and a few blocks, but most blocks are unable to be used in survival.
Weapons
There are several weapons added, some ranged, some melee. This mod adds only 10 weapons currently.
Magic Rods
There are several magic rods added by this mod.
Fire Rod
Stats
- Type: Ranged
- Damge: 3+
- Durability: 25
- Repair: Fire Charge
- Ammunition: Fire Spark
The Fire Rod is a basic shooter. It is gained by killing a Fire Wizzrobe (Information in Mobs section).
It cannot be crafted.
Ice Rod

Stats
- Type: Ranged
- Damage: 3+
- Durability: 25
- Repair: Snowball
- Ammunition: Ice Spark
The Ice Rod is a basic shooter. It is gained by killing an Ice Wizzrobe (Information in Mobs section).
It cannot be crafted.
Lightning Rod
Stats
- Type: Ranged
- Damage: 3+
- Durability: 25
- Repair: Copper Ingot
- Ammunition: Lightning Spark
The Lightning Rod is a basic shooter. It is gained by killing an Electric Wizzrobe (Information in Mobs section).
It cannot be crafted.
Meteor Rod
Stats
- Type: Ranged
- Damage: 3+
- Durability: 50
- Repair: Fire Charge
- Ammunition: Fire Spark
The Meteor Rod is the upgraded form of the Fire Rod. It has double the durability and can be charged longer. It is gained by killing a Meteo Wizzrobe (Information in Mobs section).
It cannot be crafted.
Blizzard Rod

Stats
- Type: Ranged
- Damage: 3+
- Durability: 50
- Repair: Snowball
- Ammunition: Ice Spark
The Blizzard Rod is the upgraded form of the Ice Rod. It has double the durability and can be charged longer. It is gained by killing a Blizzrobe (Information in Mobs section).
It cannot be crafted.
Thunderstorm Rod

Stats
- Type: Ranged
- Damage: 3+
- Durability: 50
- Repair: Copper Ingot
- Ammunition: Lightning Spark
The Thunderstorm Rod is the upgraded form of the Lightning Rod. It has double the durability and can be charged longer. It is gained by killing a Thunderstorm Wizzrobe (Information in Mobs section).
It cannot be crafted.
Clubs
There are currently three clubs in the mod
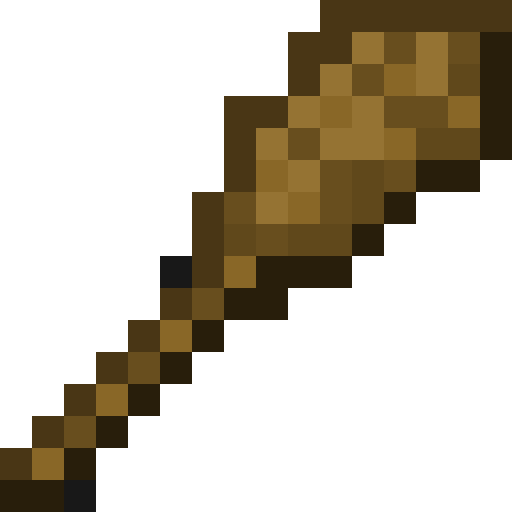
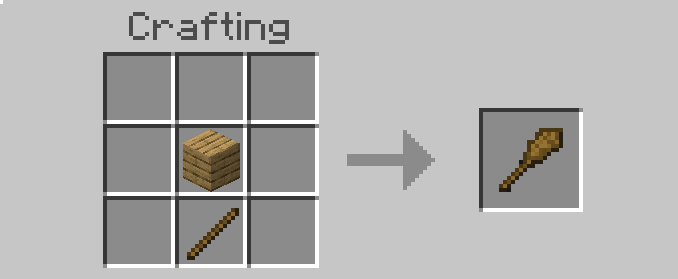
Wooden Club
Stats
- Type: Melee
- Damage: 4
- Durability: 52
- Repair: Stick
The Wooden Club is a basic item for beginners and the best thing Bokoblins, Moblins, and Lizalfos are able to make currently.
Recipie
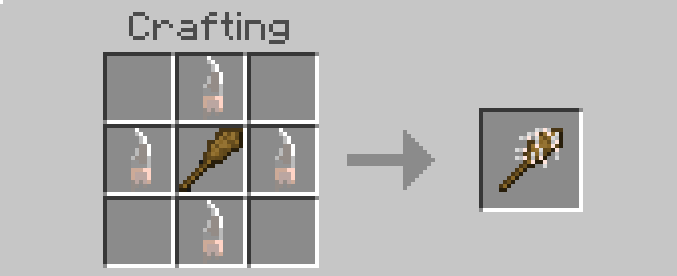
Boko Toothed Club

Stats
- Type: Melee
- Damage: 5
- Durability: 67
- Repair: Stick
The Boko Toothed club is an upgraded form of the Wooden Club. Made by shoving Bokoblin teeth into a wooden club, it has slightly better stats.
Recipie

Moblin Toothed Club

Stats
- Type: Melee
- Damage: 6
- Durability: 99
- Repair: Stick
The Moblin Toothed Club is a different ungraded version of the Boko Toothed Club. It was made by shoving Moblin Teeth onto a Wooden Club. With even better stats than the first two clubs, it works very well for beginner adventurers.
Recipie
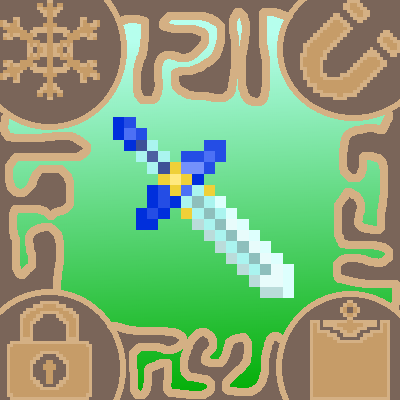
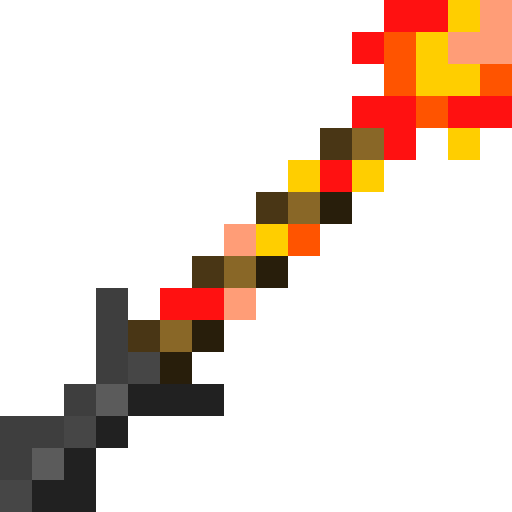
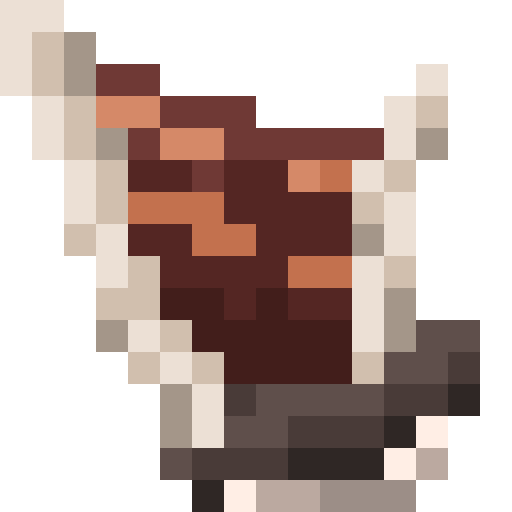
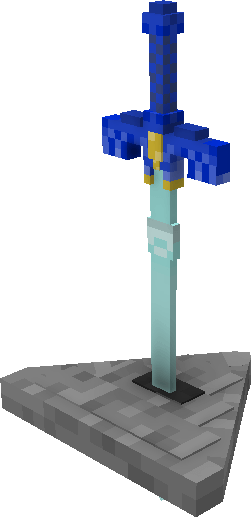
The Master Sword
Inventory Icon

3D (held) Model

Stats
- Type: Melee
- Damage: 30
- Durability: 2100
- Repair: Nethertite Ingot or Place it back into the Pedistal
The Master Sword is the most powerful weapon in the mod. This legendary sword can only be found inside the Master Sword Shrine (information in the Structures section below). To obtain you must pull it from the Master Sword Pedistal (information in the Blocks section below).
Once a Master Sword breaks, it will turn into a Broken Master Sword and must be placed back into the Master Sword Pedistal to repair it.
The Master Sword cannot be crafted.
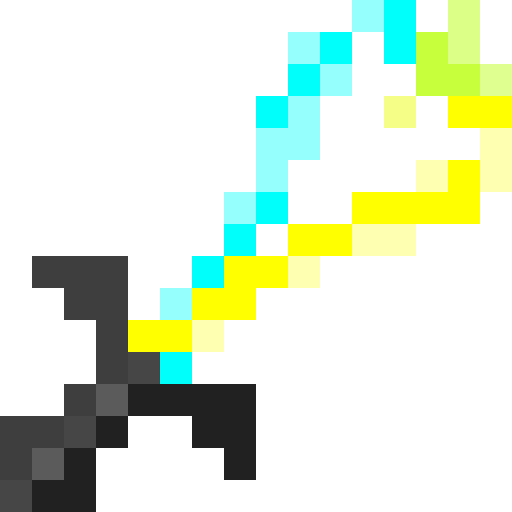
Broken Master Sword

Drops
There are over two dozen drops added in this mod. Each monster has their respective drops matched to the ingame ones.
Basic Enemies
There are a over dozen unique drops (non-vanilla items) from the basic enemies (Information on enemies in the Mobs section below.)
Bokoblin
The Bokoblin has three drops:
- 100% Bokoblin Fang: 0-5, 3-11 with Looting
- 20% Bokoblin Horn: 0-1, 1-3 with Looting
- 10% Bokoblin Guts: 0-1, 1-2 with Looting
Silver Bokoblins also drop extra items from the Silver Drop List at the bottom of the Drops Section.
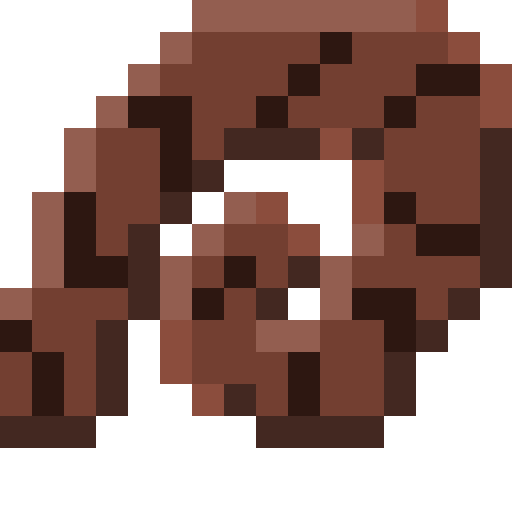
Bokoblin Fang

Bokoblin Horn

Bokoblin Guts
Moblins
The Moblin has three drops
- 100% Moblin Fang: 0-5, 3-11 with looting
- 30% Moblin Horn: 0-1, 0-3 with looting
- 10% Moblin Guts: 0-1, 1-2 with looting
Silver Moblins also drop extra items from the Silver Drop List at the bottom of the Drops Section.
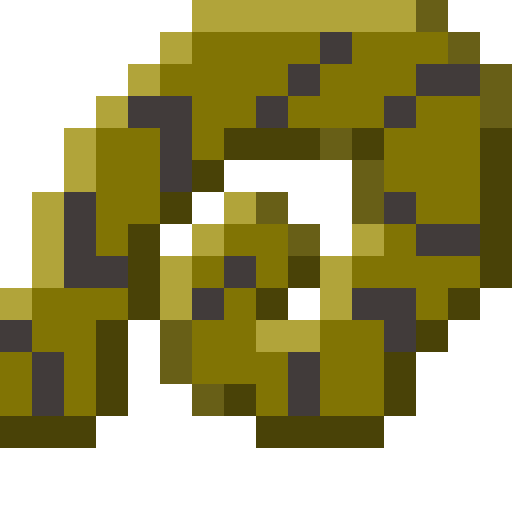
Moblin Fang

Moblin Horn

Moblin Guts

Lizalfos
The Lizalfos has three drops
- 100% Lizalfos Talon: 0-2, 2-6 with looting
- 20% Lizalfos Horn: 0-1, 1-3 with looting
- 5% Lizalfos Tail: 0-1, 1 with looting
Fire, Electric, and Icy Lizalfos will drop variants of the tail if the tail drops.
Silver Lizalfoses also drop extra items from the Silver Drop List at the bottom of the Drops Section.
Lizalfos Talon

Lizalfos Horn

Lizalfos Tail
Red Lizalfos Tail
Icy Lizalfos Tail

Yellow Lizalfos Tail
Keese
The Keese has two drops.
- 100% Keese Wing: 0-2, 0-6 with looting
- 50% Keese Eye: 0-1, 1-2 with Looting
Each variant of the keese will drop their own type of eyes and wings
Keese Wing

Keese Eye

Fire Keese Wing

Fire Keese Eye

Ice Keese Wing

Ice Keese Eye

Electric Keese Wing

Electric Keese Eye

Chuchu
Chuchus have one drop
- 100% Chuchu jelly: 0-3, 3-9 with looting
Each variant of chuchu will drop its own jelly type
Chuchu Jelly

Red Chuchu Jelly

White Chuchu Jelly

Yellow Chuchu Jelly

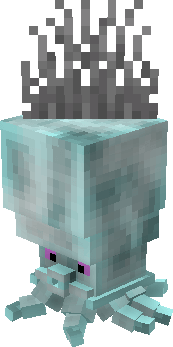
Octorok
The octorok has three drops
- 100% Octorok Tentacle: 0-3
- 50% Octorok Balloon: 0-1
- 50% Octorok Eye: 0-1
Octorok Tentacle

Octorok Balloon

Octorok Eye

Stal
Any stal mob has the normal chances for items that aren't guts (at lesser amounts). They also have an extra table for bones.
- 100% Bone: 0-6
Silver Drops
Silver mobs also have an extra set of items they can drop. This table will be run through three times with the chances and bonuses remaining the same.
- 100% Silver Roll:
- 23% Emerald: 1-4, 2-5 with looting
- 23% Iron Ingot: 1-4, 2-5 with looting
- 18% Redstone: 1-4, 2-5 with looting
- 18% Gold Ingot: 1-4, 2-5 with looting
- 12% Lapis Lazuli: 1-4, 2-5 with looting
- 6% Diamond: 1-4, 2-5 with looting
Minibosses
There are six unique drops from the three current minibosses
Molduga
The Molduga has two drops
- 100% Molduga Fin: 0-3
- 10% Molduga Guts: 0-1
Molduga Fin
Molduga Guts

Hinox
The Hinox has three drops
- 100% Hinox Toenail: 0-3
- 100% Hinox Tooth: 0-2
- 20% Hinox Guts: 0-1
Hinox Toenail

Hinox Tooth

Hinox Guts

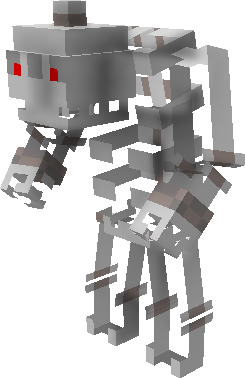
Stone Talus
The stone talus has several different possible combinations of loot tables.
The first set depends on what the talus is made of and does not contain any unique items
Stone Body
- 100% Stone: 8-16
- 100% Flint: 0-8
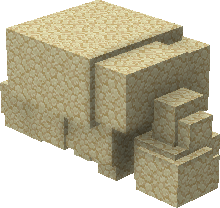
Sandstone Body
- 100% Sandstone: 8-16
- 100% Sand: 0-8
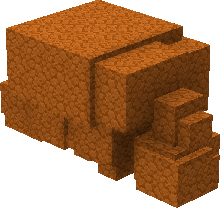
Red Sandstone Body
- 100% Red Sandstone: 8-16
- 100% Red Sand: 0-8
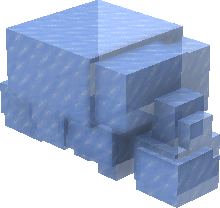
Frost Body
- 100% Packed Ice: 8-16
- 100% Snow: 0-8
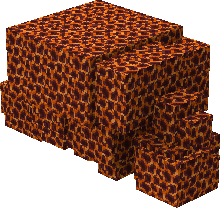
Igneo Body
- 100% Magma Block: 8-16
- 100% Blackstone: 0-8
The second set of tables depends on the Talus's rock. Only the Luminous Rock table contains a unique item.
Normal Rock
- 43% Resin Clump: 0-10
- 43% Raw Iron: 0-6
- 14% Redstone: 0-6
Luminous Rock
- 36% Resin Clump: 0-21
- 36% Raw Iron: 0-15
- 21% Lapis Lazuli: 0-15
- 7% Diamond: 0-9
- 100% Luminous Stone: 1-5
Rare Rock
- 28% Resin Clump: 0-35
- 28% Raw Iron: 0-25
- 17% Redstone: 0-25
- 17% Lapis Lazuli: 0-25
- 6% Diamond: 0-15
- 6% Netherite Scrap: 0-15
Luminous Stone

undefined
Utilities
Sheikah Slate
Inventory Icon

3D (held) Model
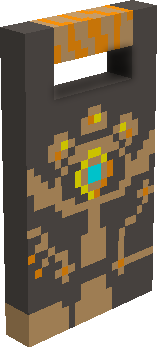
The Sheikah Slate is probably the most important and useful item in the mod. You will be given one when you first join the world, and it will be given back even if you somehow lose it. The Sheikah Slate can be held in your offhand to not take up any extra inventory space.
Use the Sheikah Slate while holding it in your mainhand to open up the action menu. The Sheikah Slate has two modes for its action menu:
Teleport Mode
and
Rune Mode
Teleport Mode
When in Teleport Mode, the Sheikah Slate will bring up a menu with four buttons:
- Towers
- Shrines
- Edit Names
- Exit
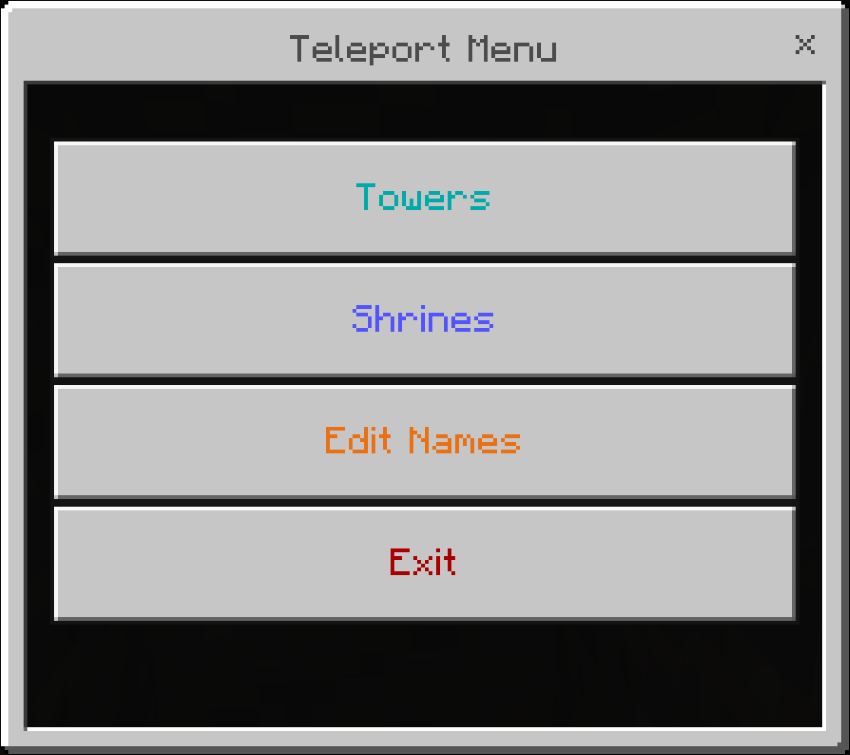
The Towers button will bring you to a seperate menu with a list of all of the names of the towers you have (Information on Towers is located in the Strcuture section below). Selecting a name will teleport you to that Tower's Teleport Pad. If you have no towers, the Menu Description will read "No Towers Avaliable".
The Shrines button will bring you to a seperate menu with a list of all of the names of the shrines you have (Information on Shrines is located in the Strcuture section below). Selecting a name will teleport you to that Shrine's Teleport Pad. If you have no shrines, the Menu Description will read "No Shrines Avaliable".
The Edit Names button will you bring to another menu. In this menu there will be a list of all of the Sheikah Structures within a 16 block radius around you. Selecting one of these buttons will bring you to the Name change Menu where you can type in a new name for that structure. Changing the name of that structue will change if for Everyone! So be careful what you change it to.
The Exit button (along with the 'X' in the top right) will close the menu.
All submenus have a back button at the bottom of their list.
Rune Mode
When in Rune Mode, the Sheikah Slate will bring up a menu with your unlocked Runes along with two other buttons:
- Set Ability Slot
- Exit
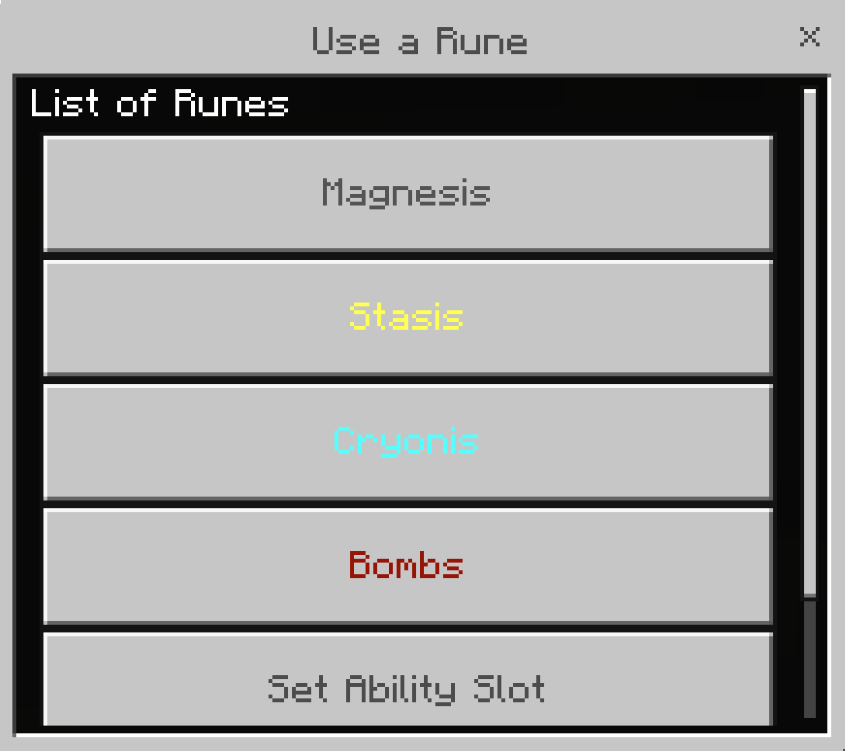
Each of the Rune Buttons will activate the Rune for you to use (information on those is in the Runes section below).
The Set Ability Slot button will pull up another menu that appears identical to the first one. This menu will let you select with Rune you want set to your ability slot to. To activate your Ability Slot Rune, hold your Sheikah Slate in your mainhand, crouch, and then punch the ground or a mob.
The Exit button (along with the 'X' in the top right) will close the menu.
All submenus have a back button at the bottom of their list.
Secret/Unsed
Bomb Bow and Arrow
Stats
- Type: Ranged
- Damage: 6 + Explosion
- Durability: 256
- Repair: Stick
The Bomb Bow is a unique item in that it fires bomb arrows. These arrows deal a decent amount of damage and also have an explosion along with them. The explosion will break blocks. The Bomb Bow's only real purpose currently is to help with |Removed: Still In-Progess|.
Bomb Arrow
Blocks
Guidance Stones
Guidance Stone Variant #1
Guidance Stone Variant #2
There are two versions of the Guidance Stone. They both work the same functionally as interaction points for your Sheikah Slate, so the only difference is for the appearance to be matching. Each Guidance Stone is made of two blocks: the full block base and the half block top. Guidance Stones can be found in Shrines and Towers (information in the Structures section below).
These blocks cannot be destroyed nor can they be moved by pistons.
The Master Sword Pedistal
Master Sword Pedistal Empty
Master Sword Pedistal Filled
The Master Sword Pedistal is an extremly rare block found in the Master Sword Shrine (information in the Structures section below). It has two states: Empty and Filled. Filled means the Master Sword is placed into the Pedistal and Empty means it has been removed.
When you first discover the Master Sword Pedistal, it will be in its Filled state. While in its Filled State, you can interact with the Master Sword Pedistal to begin pulling it (You have to be holding an item for this to work, I do not know why). Once you begin pulling, your camera will change and you will begin a pulling animation. You will slowly take damage as you pull (Pull succes requirements are hidden at the bottom of this portion), but if you do not have enough health to fully pull it, you will die. If anything that isn't the pedistal damages you, your pull will be reset and you will have to start all over again.
If you are successful in pulling out the Master Sword this message will broadcast throughout the whole world: "{your username} successfully pulled the Master Sword!"
Once the Master Sword is removed, the Master Sword Pedistal will enter its Empty State.
Once in its Empty state, the Master Sword Pedistal can be mined and placed in a new location. Also you can return the Master Sword to the Pedistal at any time doing so will repair it fully, but it will remove any enchantments or custom names added to it.
If you put the Master Sword back into the Master Sword Pedistal this message will broadcast throughout the whole world: "{your username} has returned the Master Sword"
Sucessful Pull Requirements:
At least full diamond armor and full hunger. This will leave you with one full heart.
Mobs
There are currently ten types of mobs in this mod with a total of 48 variants.
Basic Mobs
There are eight basic mobs
Bokoblin

The Bokoblin is the most common of the basic mobs. They carry simple wooden clubs, iron swords, and bows they find around. Most of the lower variants are weak. They can spawn immediately after world creation. Each variant has its own stats, spawn rule, and xp drop. Bokoblins can also spawn riding horses in groups of 1-4. Bokoblins will hunt and kill nearby animals, so lifestock is precious!
Red Bokoblin
Stats
- Health: 20
- Attack: 3
Spawn Rule
- Biome: Any Overworld Biome
- Time: Day Only
- Difficulty: Easy and up
Xp drop amount: 5
Blue Bokoblin
Stats
- Health: 40
- Attack: 5
Spawn Rule
- Biome: Any Overworld Biome
- Time: Day Only
- Difficulty: Easy and up
Xp drop amount: 10
Black Bokoblin
Stats
- Health: 80
- Attack: 7
Spawn Rule
- Biome: Any Overworld Biome
- Time: Day Only
- Difficulty: Normal and up
Xp drop amount: 20
Silver Bokoblin
Stats
- Health: 160
- Attack: 3
Spawn Rule
- Biome: Any Overworld Biome
- Time: Day Only
- Difficulty: Hard
Xp drop amount: 40
Stalkoblin
Stats
- Health: 3
- Attack: 1
Spawn Rule
- Biome: Any Overworld Biome and Caves
- Time: Night only on surface
- Difficulty: Easy and up
Xp drop amount: 1
Moblins
Moblins are slightly rarer than Bokoblins. They are essentially a stronger version of Bokoblins having increased health and damage. They carry wooden club, iron swords, and bows they found. Moblins only start spawning after 20 minutes of being in a world. Each variant has its own stats, spawn rule, and xp drop. Moblins will hunt and kill nearby animals, so lifestock is precious!
Red Moblin

Stats
- Health: 40
- Attack: 5
Spawn Rule
- Biome: Any Overworld Biome
- Time: Day Only
- Difficulty: Easy and up
Xp drop amount: 7
Blue Moblin
Stats
- Health: 80
- Attack: 7
Spawn Rule
- Biome: Any Overworld Biome
- Time: Day Only
- Difficulty: Easy and up
Xp drop amount: 14
Black Moblin
Stats
- Health: 160
- Attack: 9
Spawn Rule
- Biome: Any Overworld Biome
- Time: Day Only
- Difficulty: Normal and up
Xp drop amount: 28
Silver Moblin
Stats
- Health: 320
- Attack: 11
Spawn Rule
- Biome: Any Overworld Biome
- Time: Day Only
- Difficulty: Hard
Xp drop amount: 56
Stalblin
Stats
- Health: 3
- Attack: 1
Spawn Rule
- Biome: Any Overworld Biome
- Time: Night only on surface
- Difficulty: Easy and up
Xp drop amount: 1
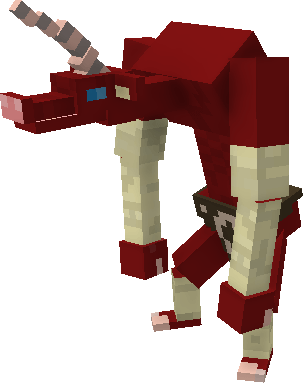
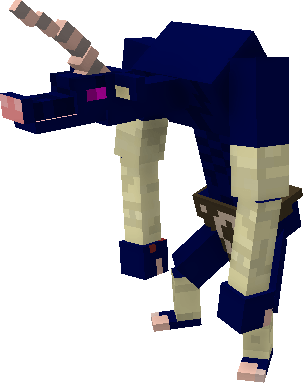
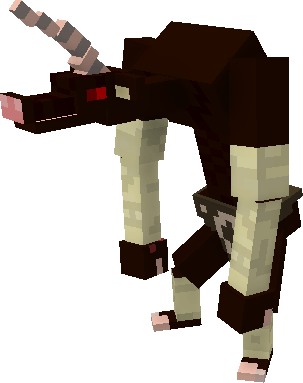
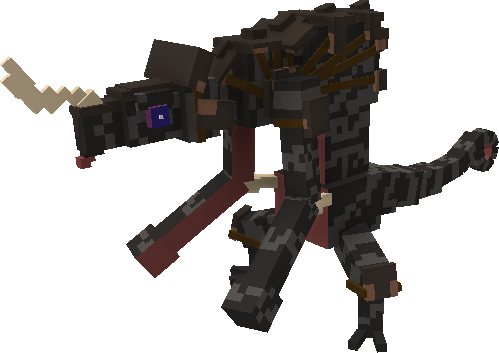
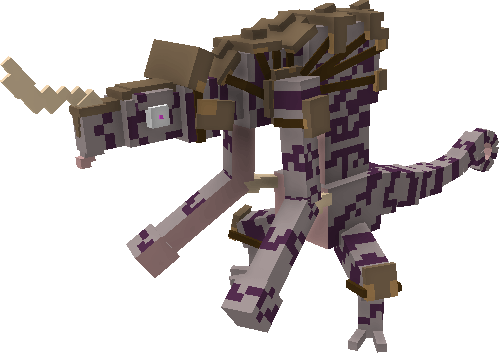
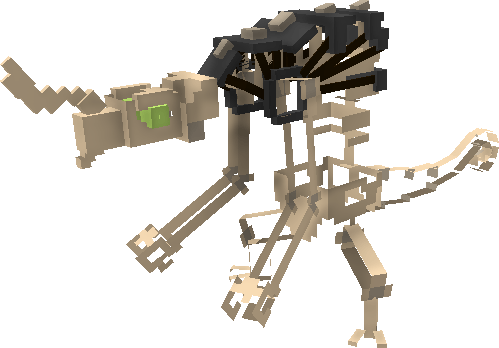
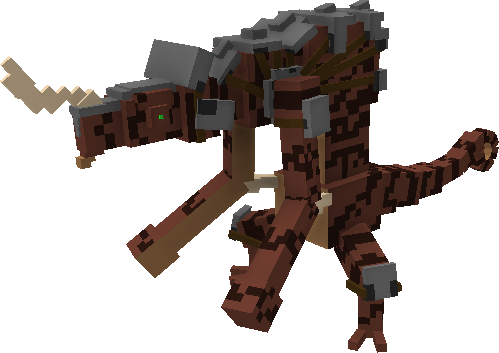
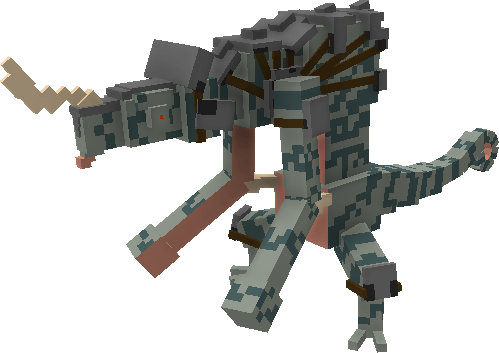
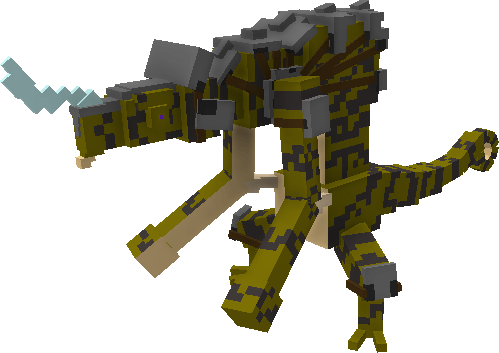
Lizalfos

Lizalfos are powerful creatures that are lizard-like, but slightly smarter. They are quick and leap high. They also have breath and tounge attacks. They carry around wooden clubs, iron swords, and bows they found. They can only spawn after 40 minutes in a world. Each variant has its own stats and spawn rule. Lizalfos will hunt and kill nearby animals, so lifestock is precious!
Green Lizalfos
Stats
- Health: 50
- Melee Damage: 3
- Ranged Damage: 4
Spawn Rule
- Biome: Any Overworld Biome
- Time: Day Only
- Difficulty: Easy and up
Blue Lizalfos
Stats
- Health: 120
- Melee Damage: 5
- Ranged Damage: 4
Spawn Rule
- Biome: Any Overworld Biome
- Time: Day Only
- Difficulty: Easy and up
Black Lizalfos
Stats
- Health: 288
- Melee Damage: 7
- Ranged Damage: 4
Spawn Rule
- Biome: Any Overworld Biome
- Time: Day Only
- Difficulty: Normal and up
Silver Lizalfos
Stats
- Health: 400
- Melee Damage: 9
- Ranged Damage: 4
Spawn Rule
- Biome: Any Overworld Biome
- Time: Day Only
- Difficulty: Hard
Stalizalfos
Stats
- Health: 4
- Melee Damage: 2
- Ranged Damage: 4
Spawn Rule
- Biome: Any Overworld Biome
- Time: Night only on surface
- Difficulty: Easy and up
Fire-Breath Lizalfos
Stats
- Health: 160
- Melee Damage: 3
- Ranged Damage: 2 + fire
Spawn Rule
- Biome: Deserts. Mesa, Any Nether biome
- Time: Day Only
- Difficulty: Easy and up
Ice-Breath Lizalfos
Stats
- Health: 160
- Melee Damage: 3
- Ranged Damage: 3 + slowness
Spawn Rule
- Biome: Any cold or frozen Overworld Biome
- Time: Day Only
- Difficulty: Easy and up
Electric Lizalfos
Stats
- Health: 160
- Melee Damage: 1 + nausea
- Ranged Damage: 4
Spawn Rule
- Biome: Any Overworld Biome during a thunderstorm
- Time: Day Only
- Difficulty: Easy and up
Keese
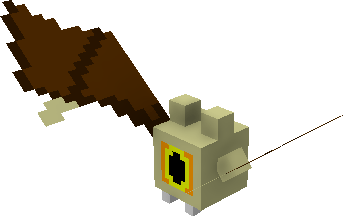
Keese are small critters that spawn alone or in large groups. Normally when you find one keese, there are several others nearby. They are weak, but they can still do large amounts of damage in thier swarms.
Basic Keese

Stats:
- Health: 5
- Damage: 1
Spawn Rule
- Biome: Any Overworld biome and caves
- Time: Night only on surface
- Difficulty: Easy and up
Fire Keese
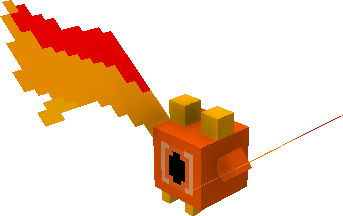
Stats:
- Health: 5
- Damage: 1 + fire
Spawn Rule
- Biome: Deserts, Mesa, Any Nether biome, and caves
- Time: Night only on surface
- Difficulty: Easy and up
Ice Keese
Stats:
- Health: 5
- Damage: 1 + slowness
Spawn Rule
- Biome: Any cold or frozen Overworld biome and caves
- Time: Night only on surface
- Difficulty: Easy and up
Electric Keese
Stats:
- Health: 5
- Damage: 1 + nausea
Spawn Rule
- Biome: Any Overworld biome and caves during lightning storms
- Time: Night only on surface
- Difficulty: Easy and up
ChuChu

Chuchus are blob-like creatures that wander the world. They are weak enemies, can their only attack is a leap which commonly fails. When their leap fails, they get stuck to the ground for a moment. There are though three sizes of chuchu, each one stronger that the smaller one. Health and damage depend on chuchu size, but spawning and drops depends on type. Chuchus will hunt and kill nearby animals, so lifestock is precious!
Small Chuchu

Stats:
- Health: 3
- Damage: 1
Spawn Rule
- Biome: Depends on type
- Time: Depends on type
- Difficulty: Depends on type
Medium Chuchu

Stats:
- Health: 20
- Damage: 2
Spawn Rule
- Biome: Depends on type
- Time: Depends on type
- Difficulty: Depends on type
Large Chuchu

Stats:
- Health: 48
- Damage: 4
Spawn Rule
- Biome: Depends on type
- Time: Depends on type
- Difficulty: Depends on type
Blue Chuchu

Stats:
- Health: Depends on size
- Damage: Depends on size
Spawn Rule
- Biome: Any Overworld biome and caves
- Time: Any time
- Difficulty: Easy and up
Fire Chuchu

Stats:
- Health: Depends on size
- Damage: Depends on size
Spawn Rule
- Biome: Deserts, Mesas, Any Nether biome, and caves
- Time: Any time
- Difficulty: Easy and up
Ice Chuchu

Stats:
- Health: Depends on size
- Damage: Depends on size
Spawn Rule
- Biome: Any cold or frozen Overworld biome and caves
- Time: Any time
- Difficulty: Easy and up
Electric Chuchu

Stats:
- Health: Depends on size
- Damage: Depends on size
Spawn Rule
- Biome: Any Overworld biome and caves during a thunderstorm
- Time: Any time
- Difficulty: Easy and up
Octorok
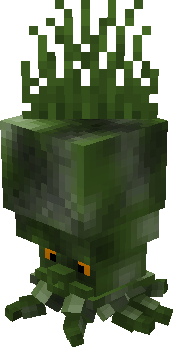
Octoroks are creatues that hide under the ground and pop up to attack passing creatures. They fire small rocks to damage anything it deems an enemy. Each type of variant has the same health, it is simply looks and abilities that are different.
Forest Octorok

Stats
- Health: 20
- Damage: 3
Spawn Rule
- Biome: Plains and Forests
- Time: Any
- Difficulty: Easy and up
Extra Abilities: none
Water Octorok

Stats
- Health: 20
- Damage: 3
Spawn Rule
- Biome: Water, Swamps, and Beaches
- Time: Any
- Difficulty: Easy and up
Extra Abilities: can breath underwater and swim
Rock Octorok
Stats
- Health: 20
- Damage: 3
Spawn Rule
- Biome: Stony Mountains and beaches, Basalt Deltas, and caves
- Time: Any
- Difficulty: Easy and up
Extra Abilities: none
Snow Octorok
Stats
- Health: 20
- Damage: 3
Spawn Rule
- Biome: Cold and Frozen biomes
- Time: Any
- Difficulty: Easy and up
Extra Abilities: none
Treasure Octorok
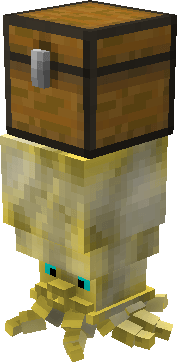
Stats
- Health: 20
- Damage: 3
Spawn Rule
- This mob does not naturally spawn
Extra Abilities: none
Wizzrobe

Wizzrobes are magical creatures that walk in the air. They have the ability to turn themselves invisible, leaving only the patterns of their steps visible to be seen. They each have an Elemental Rod that drops along with the ammunition when they're killed. There is six variants that can be found.
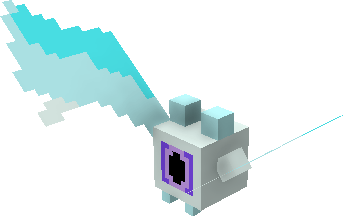
Fire Wizzrobe
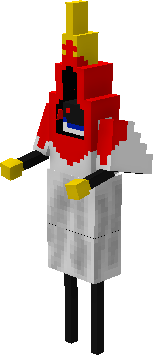
Stats
- Health: 20
- Damage: 5
- Blasts: 1
Spawn Rules
- Biome: Deserts and Mesa
- Time: Night Only
- Difficulty: Easy and up
Ice Wizzrobe
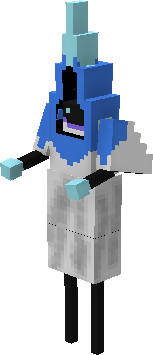
Stats
- Health: 20
- Damage: 3 + slowness
- Blasts: 1
Spawn Rules
- Biome: Cold Biomes
- Time: Night Only
- Difficulty: Easy and up
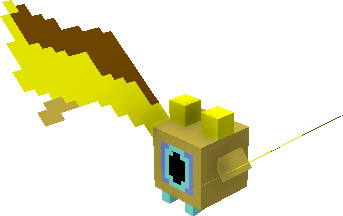
Electric Wizzrobe

Stats
- Health: 20
- Damage: 3 + nausea
- Blasts: 1
Spawn Rules
- Biome: Any overworld biome during a lightning storm
- Time: Night Only
- Difficulty: Easy and up
Meteo Wizzrobe
Stats
- Health: 40
- Damage: 5
- Blasts: 3
Spawn Rules
- Biome: Any nether biome
- Time: Night Only
- Difficulty: Easy and up
Bizzrobe

Stats
- Health: 40
- Damage: 3 + slowness
- Blasts: 3
Spawn Rules
- Biome: Frozen biomes
- Time: Night Only
- Difficulty: Easy and up
Thunder Wizzrobe

Stats
- Health: 40
- Damage: 3 + nausea
- Blasts: 3
Spawn Rules
- Biome: Any Overworld biome rarely during a thunderstorm
- Time: Night Only
- Difficulty: Easy and up
Pebblit

Pebblits are little creatures almost identical to Taluses, but much, much smaller. They can commonly be found around or near a Talus in little groups. They may be children or just attracted to them, no one knows. Stone Pebblits can only punch enemies and use the body loot table from the Stone Talus
Stone Pebblit
Stats
- Health: 20
- Damage: 1-2
Spawn Rule
- Biome: Plains, Forests, short mountains
- Time: Any time
- Difficulty: Easy and up
Sandstone Pebblit
Stats
- Health: 20
- Damage: 1-2
Spawn Rule
- Biome: Deserts
- Time: Any time
- Difficulty: Easy and up
Red Sandstone Pebblit
Stats
- Health: 20
- Damage: 1-2
Spawn Rule
- Biome: Mesas
- Time: Any time
- Difficulty: Easy and up
Igneo Pebblit
Stats
- Health: 20
- Damage: 1-2
Spawn Rule
- Biome: Any Nether biome
- Time: Any time
- Difficulty: Easy and up
Frost Pebblit
Stats
- Health: 20
- Damage: 1-2
Spawn Rule
- Biome: Cold or Frozen Overworld biomes
- Time: Any time
- Difficulty: Easy and up
Minibosses
There are currently three minibosses in the mod
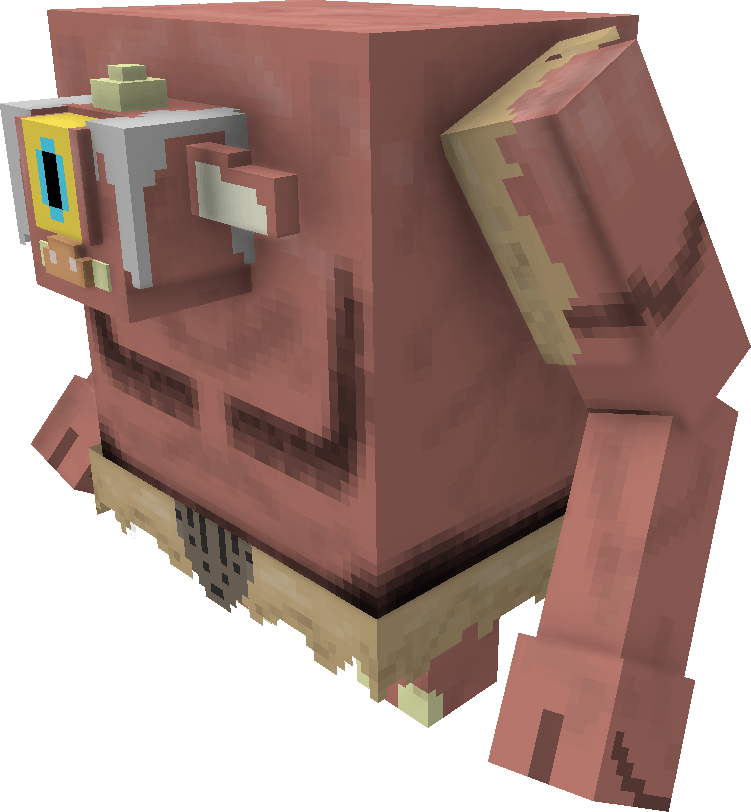
Molduga
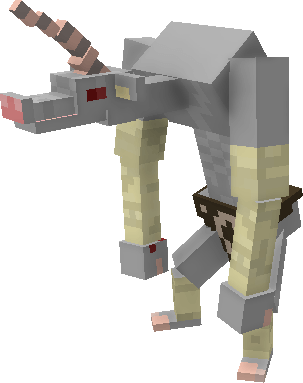
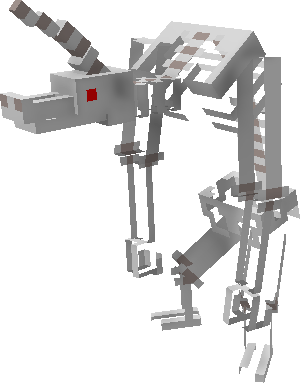
The Molduga is a powerful miniboss of the desert. It burrows underground and listens to virbrations in the ground around it. It digs and moves quickly and leaps out of the ground to kill its prey. It has high stats and damage. It can be stunned if it is hurt by an explosion.
Stats
- Health: 1500
- Damage: 30
Spawn Rule
- Biome: Deserts, Mesa, and a secret biome
- Time: Any time
- Difficulty: Easy and up
There is also a secret variant of Molduga that is biome locked.

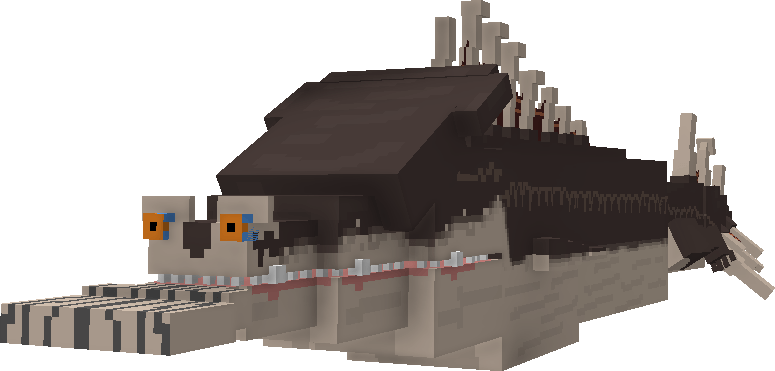
Hinox
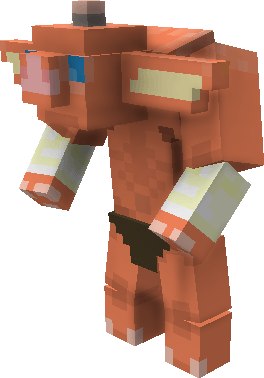
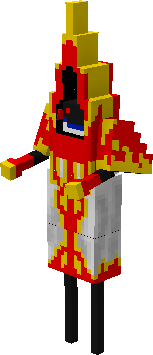
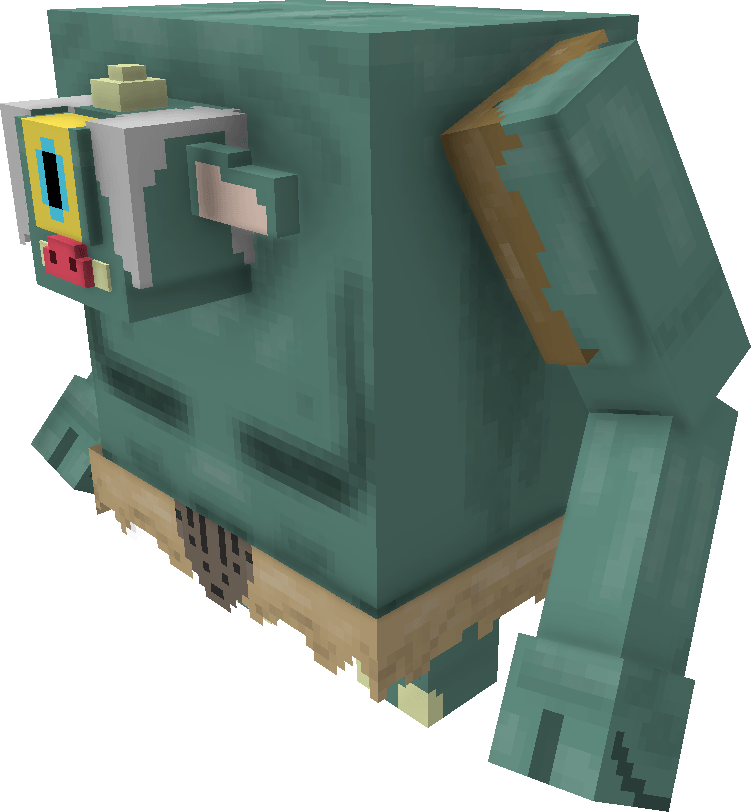
The Hinox is another powerful miniboss. It spawns in almost every biome and starts out sleeping. Damaging the Hinox will cause it to wake up. The Hinox has the ability to punch and throw rocks. It stands several blocks above the player. There are four variants
Red Hinox

Stats
- Health: 200
- Melee Damage: 8
- Range Damage: 3
Spawn Rules
- Biomes: Any overworld biome
- Time: Any time
- Difficulty: Easy and up
Xp drop amount: 50
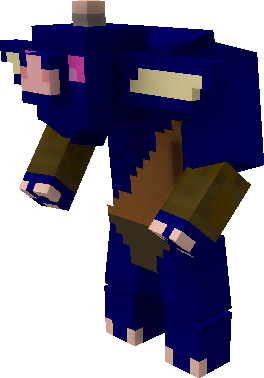
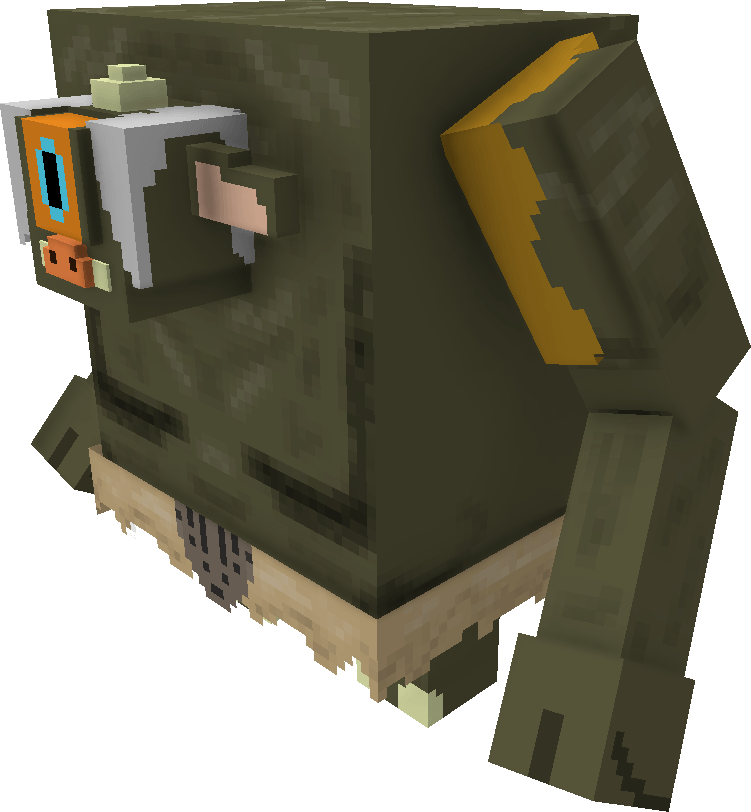
Blue Hinox
Stats
- Health: 400
- Melee Damage: 9
- Range Damage: 3
Spawn Rules
- Biomes: Any overworld biome
- Time: Any time
- Difficulty: Normal and up
Xp drop amount: 100
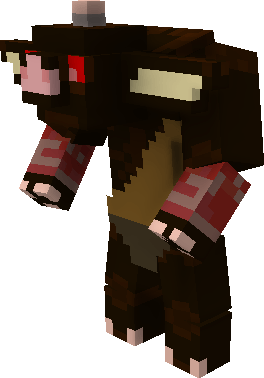
Black Hinox
Stats
- Health: 600
- Melee Damage: 11
- Range Damage: 3
Spawn Rules
- Biomes: Any overworld biome
- Time: Any time
- Difficulty: Hard
Xp drop amount: 200
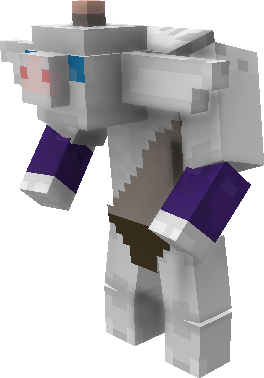
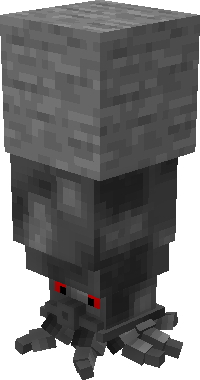
Stalnox
Stats
- Health: 30
- Melee Damage: 1
- Range Damage: 3
Spawn Rules
- Biomes: Any overworld biome and caves
- Time: Night only on surface
- Difficulty: Easy and up
Xp drop amount: 100
Can only be hurt at its eye.
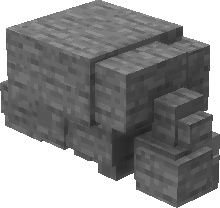
Stone Talus
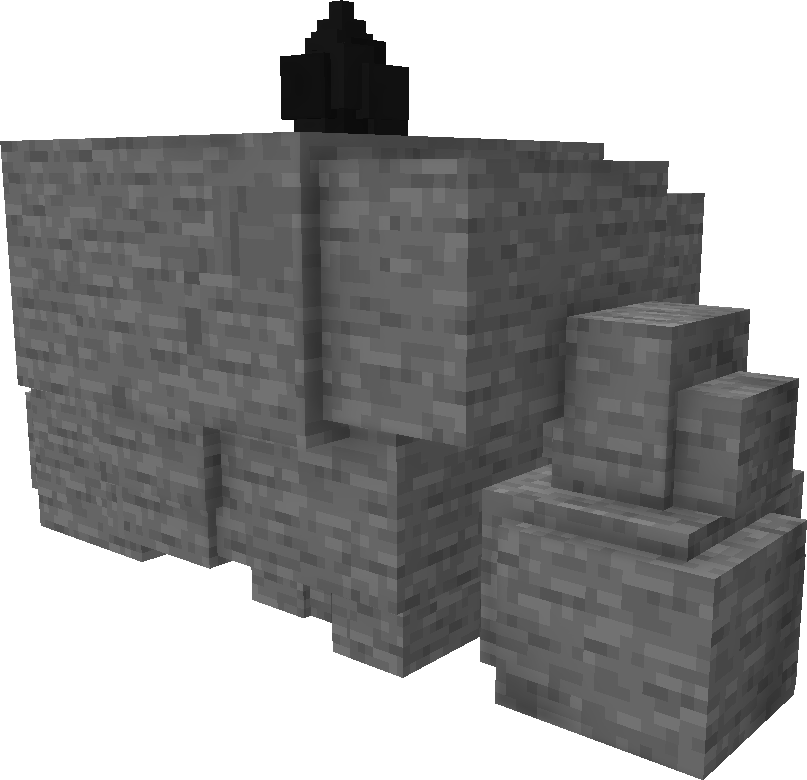
Stone Taluses are massive creatures made of pure stone. Each once stands around seven block, and slowly wanders. When they spawn, they will spawn sleeping. They will awake once they detect a player or threat. There are several different types of bodies, and three types of stones.
Normal Stone
Stats
- Health: 300
- Damage: 11-13
Spawn Rule
- Biome: Depends on body
- Time: Depends on body
- Difficulty: Easy and up
Xp drop amount: 100
Luminous Stone
Stats
- Health: 600
- Damage: 11-13
Spawn Rule
- Biome: Depends on body
- Time: Depends on body
- Difficulty: Normal and up
Xp drop amount: 200
Rare Stone

Stats
- Health: 900
- Damage: 11-13
Spawn Rule
- Biome: Depends on body
- Time: Depends on body
- Difficulty: Hard
Xp drop amount: 300
Stone Talus

Stats
- Health: Depends on stone
- Damage: Depends on stone
Spawn Rule
- Biome: Plains, Forests, small mountains
- Time: Any
- Difficulty: Depends on stone
Xp drop amount: Depends on stone
Sandstone Talus

Stats
- Health: Depends on stone
- Damage: Depends on stone
Spawn Rule
- Biome: Deserts
- Time: Any
- Difficulty: Depends on stone
Xp drop amount: Depends on stone
Red Sandstone Talus
Stats
- Health: Depends on stone
- Damage: Depends on stone
Spawn Rule
- Biome: Mesas
- Time: Any
- Difficulty: Depends on stone
Xp drop amount: Depends on stone
Igneo Talus
Stats
- Health: Depends on stone
- Damage: Depends on stone
Spawn Rule
- Biome: Any Nether Biome
- Time: Any
- Difficulty: Depends on stone
Xp drop amount: Depends on stone
Frost Talus
Stats
- Health: Depends on stone
- Damage: Depends on stone
Spawn Rule
- Biome: Cold and Frozen Overworld biomes
- Time: Any
- Difficulty: Depends on stone
Xp drop amount: Depends on stone
Structures
There are currently three types of structures: Shrines, Towers, and Master Sword Shrines
Shrines
Shrines are uncommon structures that will generate around the Overworld in any biome. Shrines are not immune to explosions or breaking, so be careful around them. Each shrine will have a Guidance Stone at the front for you to interact with and add to your Sheikah Slate. There are two types of shrines:
Rune Shrines
and
Tests of Strength
Rune Shrines
These are shrines that allow you to unlock your runes. The first four shrines discovered in any world will always be rune shrines in this order: Magnesis, Stasis, Cryonis, Remote Bombs. There is nothing else in the shrine other than the unlocking of the rune to keep it small, and you will have plenty of opportunities to use your runes outside of the shrines.
Tests of Strength
These are the more common type of shrines once the first four have been placed. There are three variants: Minor, Moderate, and Major. Each variant is harder than the one before, but provides better loot. These tests of strength shrines will be able to refresh the enemies inside, but not the loot.
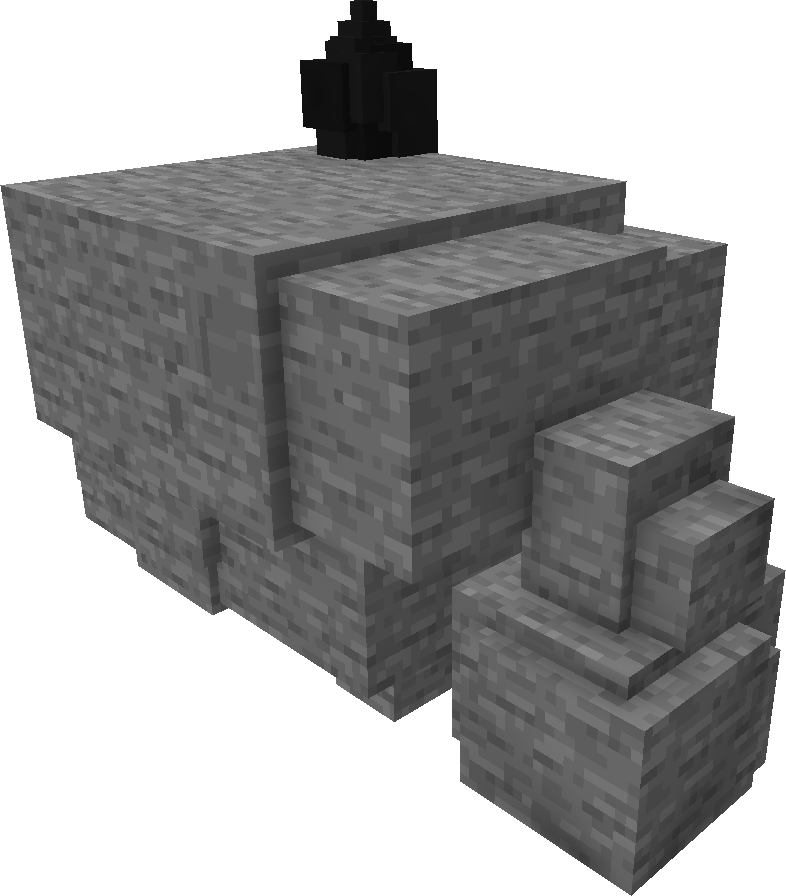
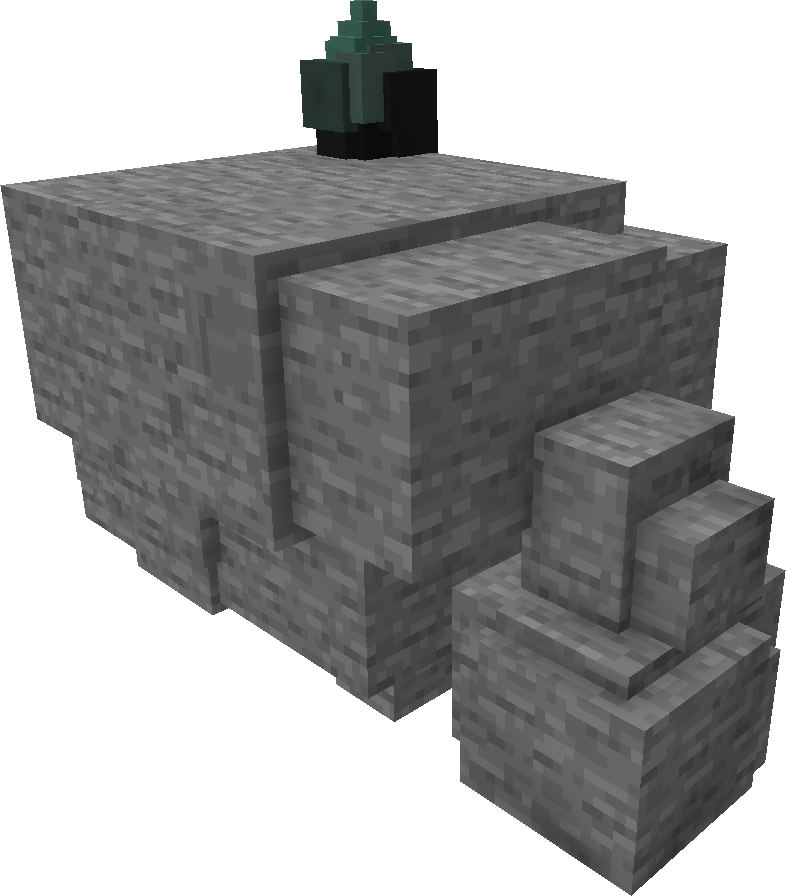
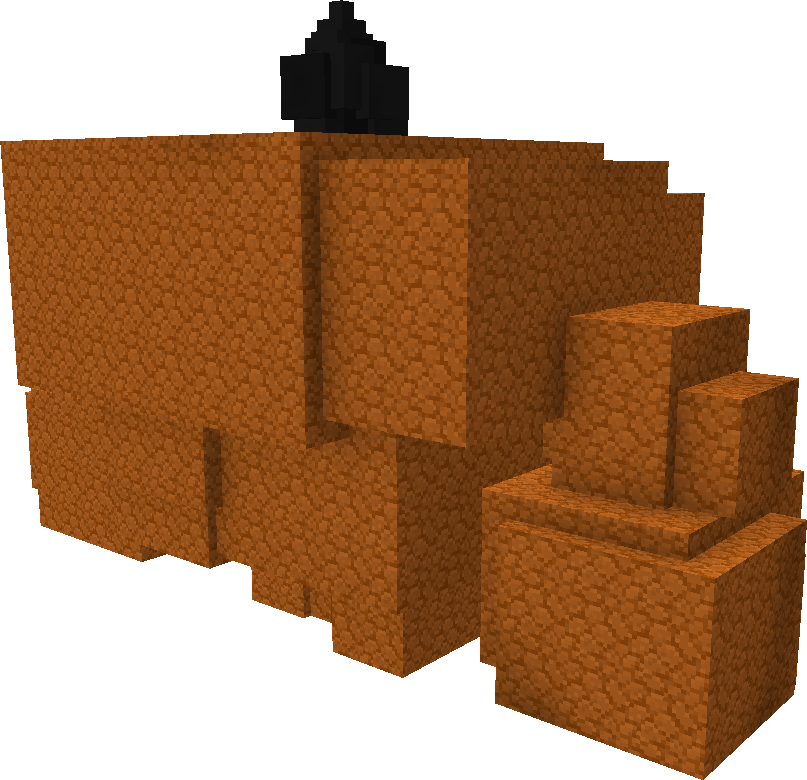
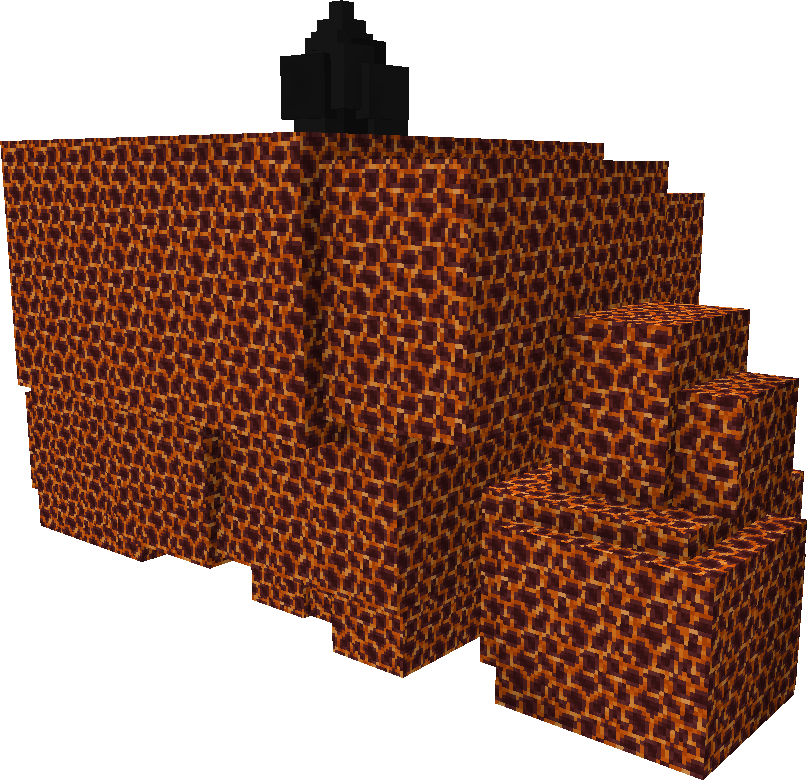
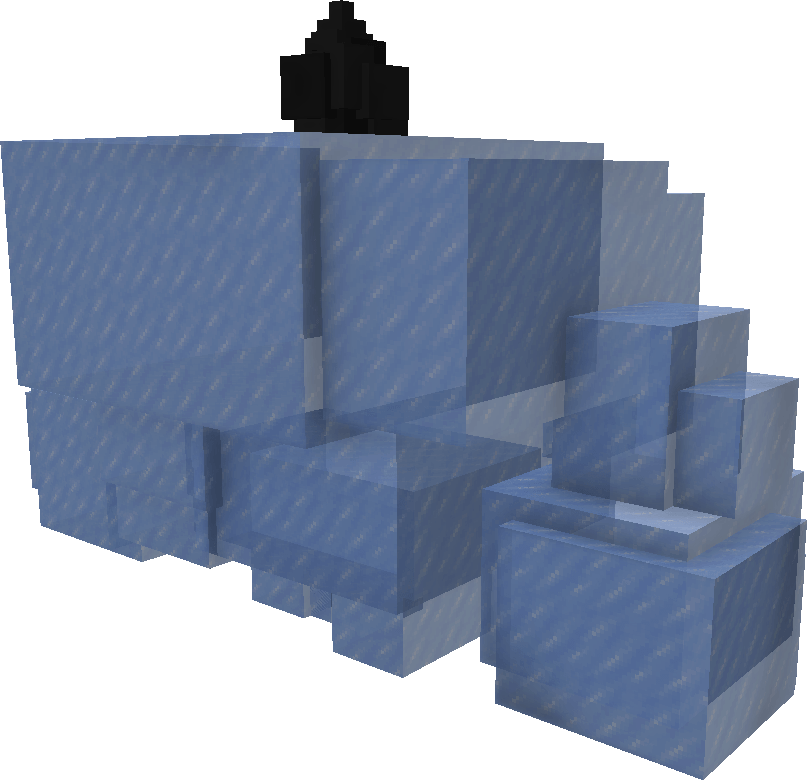
Towers
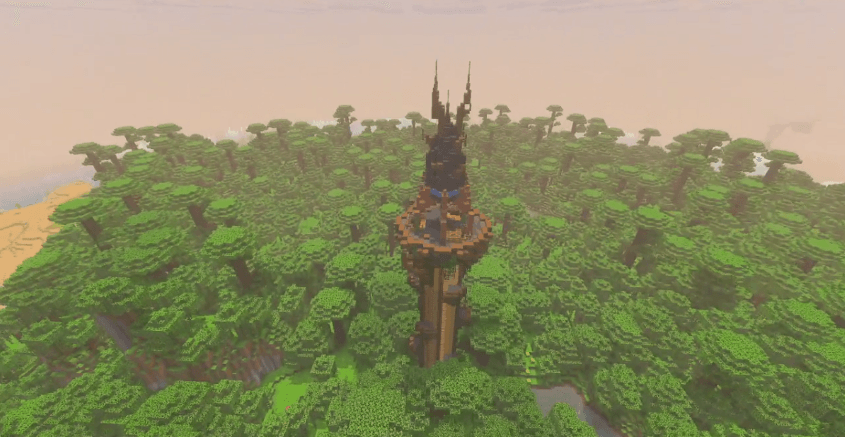
Towers are rare structures that generate across the world in all biomes. Towers serve as points to look over the world from and teleport to. They also can serve as launch points for elytra travel. Each tower has a Guidance Stone at the top for you to interact with and add to your Sheikah Slate.
There are now three sizes of towers: small, medium, and tall. The shortest is around 60 blocks tall and the tallest over 100 blocks! Each once has an equal chance of generating and you may get several of the same size in a row.
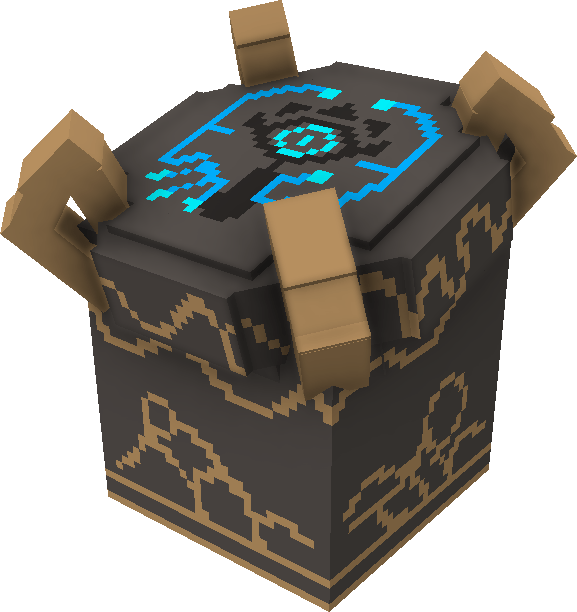
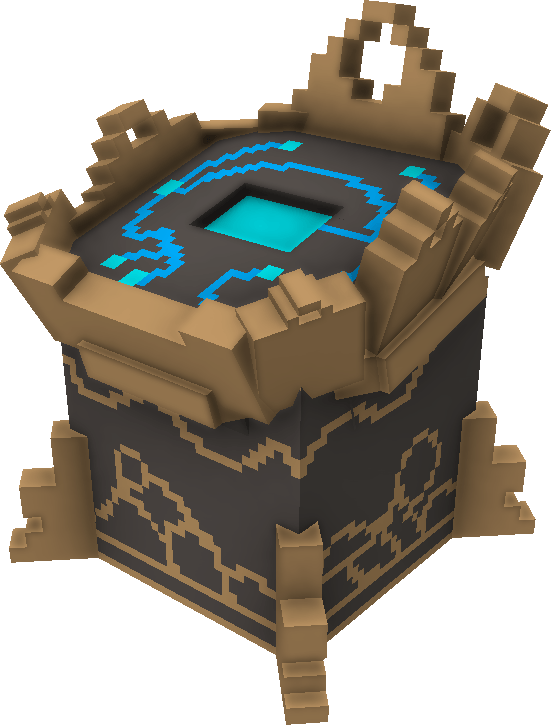
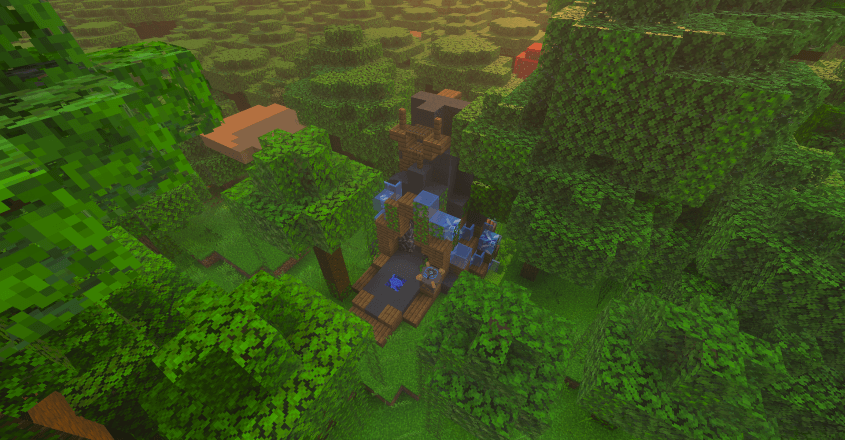
Master Sword Shrine
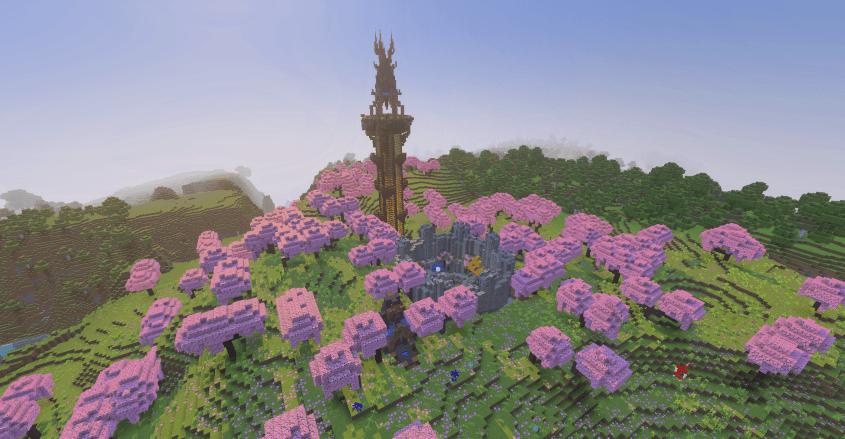
Master Sword Shrines are the rarest structures in the mod. They can only generate in meadows and cherry groves. They have nine different forms, each a at a varying state of decay. Master Sword Shrines contain the Master Sword Pedistal block in them (information located in the Blocks section above). They also tend to spawn near other Sheikah Structures, so any Master Sword Shrine should have an easy teleport nearby.
Runes
There are four runes in this mod: Magnesis, Stasis, Cryonis, and Remote Bombs (Bombs). Runes are acessed from the Rune Menu by using your Sheikah Slate.
You cancel/end any Rune by shift jumping.
Magnesis

Magnesis is the rune of moving magnetic things (iron). It can pick up and move any iron block and item. It can also pick up minecarts (Iron Golems would not work sadly).
Directions
To Activate:
- Go to Rune Menu
- Select "Magnesis"
or if it is your ability slot:
- Shift and punch while holding your Sheikah Slate
To use:
- Once acitvated, find an iron block or item or a minecart.
- Interact with that block or the block under the item/minecart while holding your Sheikah Slate.
- It will pop up and move where you are looking.
- Shift to move it closer.
- Jump to move it farther.
- Shift and Jump to end it. Blocks will be placed down, items and minecarts will fall..
undefined
Stasis

Stasis is the rune of freezing time. Since minecraft doesn't have any moving obstacles, it is used to freeze mobs. It lasts five seconds before ending. Any damage a mob has taken during stasis, it will take the force and then apply that force once the mob becomes unfrozen, unless the mob dies.
Directions
To Activate:
- Go to Rune Menu
- Select "Stasis"
or if it is your ability slot:
- Shift and punch while holding your Sheikah Slate
To use:
- Once acitvated, punch a mob or player to freeze them.
- Continue hitting the mob or player to add force.
- Watch them fly away!
Cryonis

Cryonis is the rune of ice. It is used to make pillars of ice on water. If you place a pillar next to or where you are standing, you will be lifted with the ice. You can only place three pillars at a time. Pillars can only placed on the top of water. Pillars will only last ten seconds. Due to limitations, you will have to wait for a pillar to melt before placing the next one if you have reached your limit.
To Activate:
- Go to Rune Menu
- Select "Cryonis"
or if it is your ability slot:
- Shift and punch while holding your Sheikah Slate
To use:
- Once activated find some water.
- Interact with the top of the water while holding your Sheikah Slate.
- An ice pillar will form. Only you will be teleported up, no other players or entities.
undefined
Remote Bombs (Bombs)

Remote Bombs are simply what they are named, two bombs that have slightly different properties. There is a Round Bomb and a Square Bomb. Round Bombs move better on the ground, but Square Bombs will lauch with more power into the air. When using Bombs, standing still will lightly throw the Bomb on the ground, but jumping when using will launch the Bomb into the air.
To Activate:
- Go to Rune Menu
- Select "Bombs"
- Select either Square Bomb or Round Bomb
or if it is your ability slot:
- Shift and punch while holding your Sheikah Slate
To use:
- Once activated look in the direction you want to bomb to go.
- Use the Sheikah Slate.
- If you are standing, you will lightly throw the bomb in the direction you are facing.
-
If you are jumping, you will launch the bomb in the direction you are facing.
Showcase video
Permissions:
Dos:
- You are allowed to download and use the mod
- You are allowed to show the mod in a video, ONLY if you give credit and a link to this modpage
- You are allowed to share the link to this modpage
- You are allowed to comment for suggestions and bug reports.
Dont's:
- You are not allowed to copy anything from this mod as claim it as your own (code, models, textures, sounds).
- You are not allowed to make your own links to any of my pages.
- You are not allowed to post this mod anywhere else.
Common Bugs:
- Some Towers will rarely have portions missing from them, or the portion will be unaligned
Thank You!